How to bracket exposures for HDR
Some scenes simply outrun the sensor: a dark room against a bright window, a sunset sky over land already in shadow. The span from brightest to darkest exceeds the camera's dynamic range, so one frame must choose: hold the sky and drown the shadows, or lift the shadows and burn the sky to blank white that no recovery can refill. Bracketing refuses the choice: three or five frames, identical except for shutter speed, stepped about two stops apart, blended so each part of the scene comes from a frame that exposed it well. Two disciplines decide whether the result looks like a photograph or a video game. First, bracket the SHUTTER only, never the aperture, which would change depth of field between frames, and never focus or framing; the frames must differ in brightness and nothing else. Second, blend with restraint. The infamous crunchy, halo-ringed HDR look comes from compressing the tones until nothing in the frame is allowed to be dark, but believable contrast NEEDS true blacks, and a night scene that has no night left in it reads instantly as false. Check the honest alternative first: modern sensors hold enormous range in one RAW file, so read the histogram (if only one end clips, a single frame exposed for the highlights and lifted in the shadows is simpler and often cleaner). Bracket when BOTH ends clip at once; that is the scene one frame cannot hold.
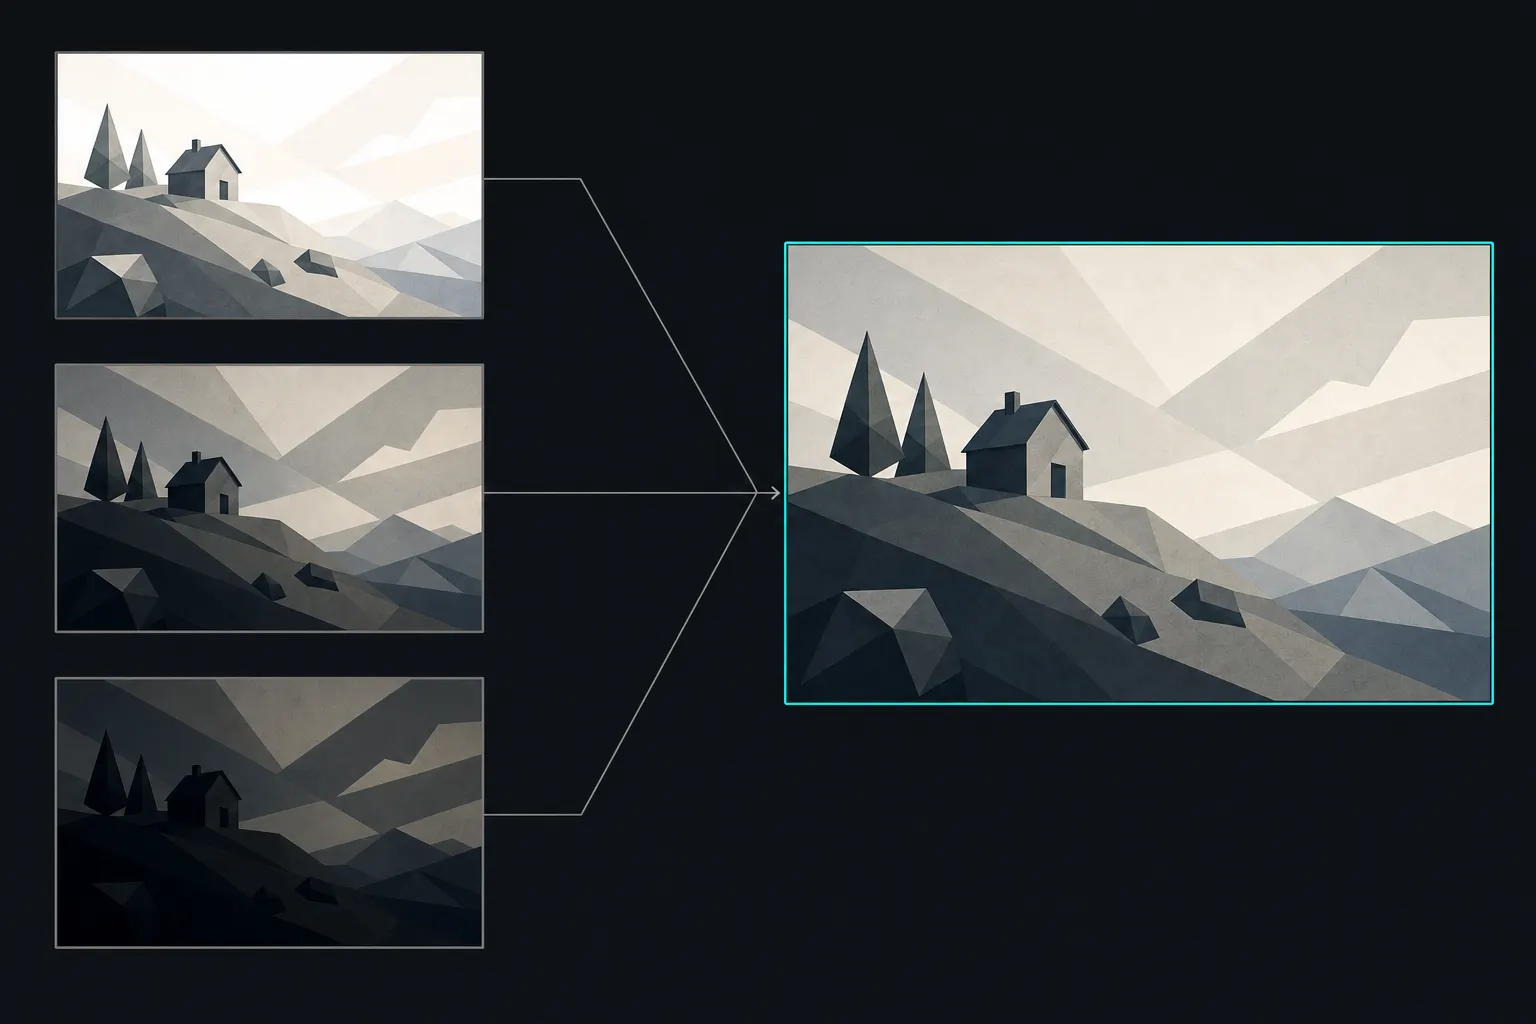
Starting points
- When to bracket
- The histogram clips at BOTH ends in a single frame. One-end clipping is a job for exposure placement and RAW latitude, not a bracket.
- Frames & spacing
- Start with 3 frames at ±2 EV around the metered exposure; a brutal span (interior + sunlit exterior) may want 5. More frames buys smoothness, not range you don't need.
- What varies
- Shutter speed ONLY. Aperture shifts depth of field between frames; ISO shifts noise character. Auto-bracketing modes do this correctly: confirm yours brackets the shutter.
- Stability
- Tripod for clean alignment, or a fast continuous burst handheld: modern alignment absorbs small drift, but the less the frames disagree, the less the blend has to invent.
- Base exposure
- Meter the midtones for the middle frame and let the bracket reach both ways. Confirm the darkest frame holds the brightest highlight, and the brightest frame opens the deepest shadow you care about.
- Format
- RAW, always: the blend works in the full bit depth, and the merged file keeps its latitude for editing.
In the field
- Read the histogram: both ends clipping? Bracket. One end? Place the exposure and move on.
- Lock focus, aperture, white balance, and framing; the frames may differ only in shutter.
- Fire the bracket in one continuous burst so nothing in the scene has time to move.
- Verify the extremes: highlights held in the darkest frame, shadows open in the brightest.
- Merge, then set the black point FIRST: a scene with real darkness in it should keep some.
- Zoom the high-contrast edges: halos there mean the tone compression went too far (back it off).
When it fails
- The crunchy 'HDR look': halos, gray blacks, everything glowing
- The tone mapping compressed the frame until nothing was allowed to stay dark. Rebuild from the merge: set a true black point, protect the global contrast, and let the shadows be shadows (the goal is a scene that looks the way it felt, not a frame where every surface fights for brightness).
- Ghosts: a person or branch half-present at an edge
- Something moved between the bracketed frames, so the blend holds two half-versions of it. Use the merge tool's de-ghosting (it picks ONE frame for the moving region), shoot the bracket as a faster burst, or take the moving zone entirely from a single frame.
- The merged file is soft where the frames disagree
- The frames didn't align: handheld drift, or the aperture (and with it depth of field) changed between frames. Bracket the shutter only, brace or mount the camera, and shoot the sequence as one continuous burst rather than three deliberate presses.
Stitched or compressed: get the honest read.
A technique assembles the frames; a critique reads the result. Upload your finished panorama or a standout single frame and FinalFrame returns the full diagnosis: what works, what limits the frame, and whether the fix lives at the desk or back in the field.
Criticar una foto