Masking
Applying edits to specific areas of the image rather than the whole frame.
FinalFrame ocenjuje svaku fotografiju od 0 do 10: 6 je solidna, 8 je vredna portfolija, a 9 je izložbenog nivoa. Kako funkcioniše ocenjivanje
Šta je zapravo
Every adjustment in an editor asks two questions, and they are independent: what to do, and where to do it. The exposure slider, the contrast curve, the hue shift, the sharpening pass: each answers only the first. Left alone, they all give the same answer to the second: everywhere. That default is the quiet enemy of most edits, because a photograph's problems are almost never everywhere. The sky is two stops too bright while the land is right. One face needs a lift the background must not get, or the lift drags the noise floor up with it. A window runs cool while the room runs warm, and one white-balance number cannot serve both. A global slider fixes one region by taxing every other region in the frame: the move that helps the sky hurts the land, and the compromise shows.
The mask is the instrument of the where. Mechanically it is nothing but a selection map: a grayscale stencil riding under an adjustment, telling it where to land at full strength, where to fade, and where to be withheld entirely. White means the adjustment applies; black means it does not; the greys are partial. And the stencil is deliberately blind to its cargo: the same sky selection can darken the sky, cool it, or add contrast to it, because the selection only ever answers where. That blindness is why masking underwrites so much of the rest of post: dodge and burn is a masked luminance move, a graduated warm-up is a masked color move, selective sharpening is a masked detail move (different cargoes, one act of selection). This lesson stays on the where and leaves each what to its own page.
It also has a fixed place in the hierarchy: masking is the instrument inside edit discipline, not a rival to it. The discipline's rule, the local move over the global slap, is only executable because masks exist, and it is only as good as the selection doing the localizing. What separates a masked edit that reads as photography from one that reads as cut-and-paste is almost never the adjustment riding on top. It is the quality of the selection underneath: whether its edge follows a real boundary in the picture, and whether, when the work is done, a viewer can find where the mask begins.
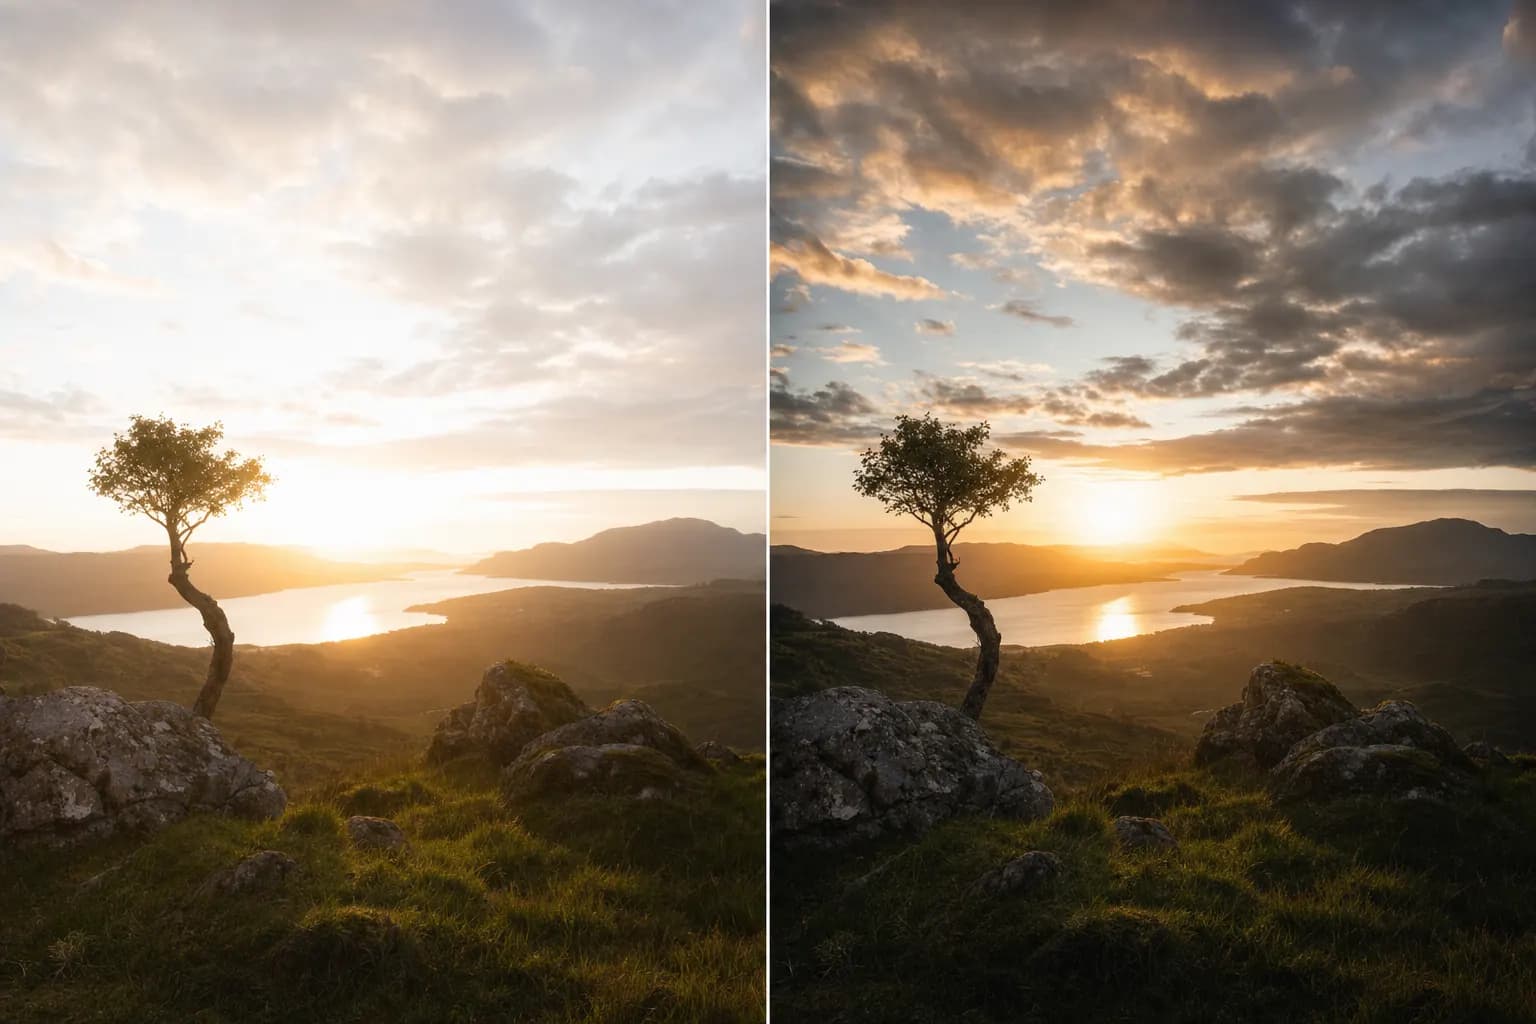
Generisano pomoću AI
Zašto 6 nije 8
A 6 makes the right local move and lets you see where it was made. An 8 makes the same move and hides the border completely. That is the whole axis, and it is worth being precise about what the 6 usually is: a correct instinct executed with a selection that betrays it. The sky WAS too bright; the subject DID need lifting: the diagnosis was sound and the where was sloppy. A hard-edged selection laid over a soft boundary leaves a bright or dark rim where the adjustment stops abruptly: the halo, the most legible seam a judge can spot. An AI "Select Subject" taken at its first guess lets the darkened background creep a few pixels into the hair while the shoulders wear a faint cut-out glow: the subject sits on the frame like a sticker rather than in it. A brush that spilled lets a warm-up slide off the wall and onto the skin. In every case the frame announces that it was worked on, and announces exactly where.
An 8's selections are undetectable. Its edges follow the real boundaries in the scene (feathered where the boundary is soft, tight where it is crisp, refined through hair and foliage so no rim survives) and its adjustments fade out where the eye already expects the light or the color to change, which is why they read as light instead of as editing. The judge's tell is reconstruction: can the masks be found? On a 6 they trace every border from across the room. On an 8 the judge sees a photograph with better light and cleaner color and cannot locate a single selection that built it.
Keep the claim honest at both ends. An invisible selection is never most of what lifts a frame: the idea, the light, and the moment do that, and no mask supplies them. But it is the entire difference between a local edit that convinces and one that confesses. The same move, at the same strength, on the same frame, either disappears into the picture or draws its own outline, and only the selection decides which.
Pre okidanja
Masking is a post tool, so its seeing splits across the shutter and the screen, and the shutter half comes first. At capture, previsualize the selections the edit will need. A sky you already know you will darken wants a clean, un-fringed horizon to select against. A subject you mean to isolate wants a moment of real separation from its background, because no tool can cleanly mask an edge that dissolves into a tone identical to it. Shoot knowing where the borders of your future adjustments will fall, and the masks draw themselves later.
At the screen, the first read is diagnostic: which regions actually need isolating, and what KIND of boundary defines each? The answer chooses the tool, because masks come in families and each fits a different edge. A region defined by BRIGHTNESS (recover only the highlights, add contrast only to the shadows) calls for a luminosity mask, which selects pixels by their tone, so its edge is drawn by the light itself and needs almost no cleanup. A region defined by HUE (tame one loud jacket, lift only the greens) calls for a color mask. A soft, directional transition (a sky grading down to a horizon, a bright corner to pull down) calls for a graduated mask, whose falloff is feathered by construction. A POOL of attention (a subject to lift gently out of its surround, a pocket of light to widen) calls for a radial mask, which fades center-out and never had a hard edge to show. A hard, complicated object (a figure against sky, a building edge) is where "Select Subject" and "Select Sky" earn their place, but only as a starting point: the first guess is generous and approximate, and the real work is the refine pass that walks the true boundary through hair, glass, and foliage. The free-hand brush is the tool of last resort, for the region no rule can describe.
Then learn to see your own seams, because adapted eyes forgive them. Zoom to 100% and walk every mask's edge hunting for a halo or a hard cut line; zoom out to a thumbnail to confirm no adjustment has spilled into a region it was never meant to touch. The two extremes catch what the comfortable middle view hides: the seam lives at 100%, the spill lives in the thumbnail, and neither is visible from where the editing actually happened.
U kameri
You cannot make a clean selection against a boundary the capture never gave you, so the shutter's job is to hand the mask two things: an edge it can find, and data on both sides of that edge worth adjusting. Two habits do most of the work.
First, separate at capture what you intend to isolate in post. A subject you plan to mask off its background needs a real border (a step of tone, color, or focus along its edge) because every selection tool, AI or luminosity or brush, can only follow a boundary that EXISTS. A dark subject against a background of the same tone offers the mask nothing to grip, and no refine pass invents a border the light never drew; that fix is the subject-separation lesson's, and it is bought at the scene, not at the desk. Second, protect the tone in every region you plan to adjust. A masked highlight move needs detail still living in the highlights to reveal, and a masked shadow-lift needs clean data in the shadows or the isolation only exposes noise: a lifted region of pure grain is a seam of its own kind. Expose to hold both ends and shoot RAW for the latitude, exactly as the exposure lesson argues from its own side. The cleanest mask ever drawn is still no better than the edge and the data underneath it.
U obradi
This is where the craft actually lives, and it is mostly about the edge and the stack. Start from the cleanest available selection rather than the most manual one: let a luminosity or color mask define a tonal or hue region automatically, let a graduated or radial mask carry any transition that is soft by nature, let "Select Subject" or "Select Sky" rough in a complex object, and reserve the brush for correcting what those leave behind. Hand-painting from scratch what an automatic mask would have edged better is the slow road to a worse result.
Then make the selection invisible with two controls. FEATHER is the width of the transition (the band over which the adjustment fades from full to none) and it must MATCH the boundary underneath: a soft edge (hair, an out-of-focus background, a gradual sky) wants a wide feather; a crisp edge (a hard architectural line) wants a narrow one. A feather too tight for a soft boundary is exactly what leaves a halo; a feather too wide for a hard one lets the adjustment bleed across it. And REFINE the edge of every object mask: the pass that pushes the selection off the AI's generous first guess and onto the true boundary, catching the strands and gaps a block selection amputates.
The power the beginner never reaches for is that masks STACK. Two selections combine with Boolean logic. INTERSECT them and the adjustment lands only where BOTH are true: a luminosity mask intersected with a subject mask hits only the bright parts of the subject and leaves the equally bright background alone. SUBTRACT one from another and you carve a hole: select the sky, then subtract the tree line poking into it, so a sky-darkening move stops cleanly at the branches instead of dropping onto them. Stacking is how a selection gets specific enough to disappear, and the payoff runs in a direction worth naming: the more precisely the mask describes its region, the less the adjustment has to be dialed back to hide the spill. Precision buys strength: a loose mask forces a timid edit; an exact one lets the full move land and still stay hidden.
And precision only buys strength up to the point the subtlety discipline sets. The mask hides the border; restraint hides the move. Even a technically perfect selection carries an adjustment the eye can catch: a region relit past what the scene could have offered reads as a shape laid onto the picture, however clean its edge. Toggle each mask off and on: if the change arrives as better light, it is working; if it arrives as an object (a glowing oval, a too-dark sky sitting on the land like a lid), the move is past what the where can excuse.
Know the failure taxonomy by its tells, because they are the seams a judge reads. The HALO: a mask edge too hard or too tight for a soft boundary, a bright or dark rim glowing where the adjustment stops. The CUT-OUT: an unrefined object selection, the subject wearing a faint outline like a sticker pressed onto the background. The SPILL: an adjustment that ran past its region (a warm-up on the skin, a sky-darkening on a rooftop) because the mask was looser than the edit was strong. Each is a where that failed its what, and each is an edit-discipline failure wearing a selection's costume: the local move was right, and the border showed anyway.
The honesty clause: a mask isolates detail that exists; it cannot isolate detail that was never recorded. Select a blown-white sky and the selection is flawless around a region of nothing: there is no texture inside it for the highlight move to reveal, the same scar the exposure lesson describes, and no stencil un-bakes it. Mask a subject whose edge merges into an identical background and the selection has no boundary to find: the tool returns a guess because the light never drew a line. When the frame gave the mask no edge and no data to work with, the limit is capture-limited, and the honest fix is a separated, protected exposure next time, not a more elaborate selection now.
Lestvica
- Beginner: global, or brushed raw. Every adjustment lands everywhere, or a hard brush at full opacity with no feather stands in for a selection; the automatic masks go unused because they are unknown. The first local attempts wear halos and cut-out rims.
- Competent: auto-assisted, unrefined. "Select Subject" and "Select Sky" are in the toolkit, the brush gets feathered, the worst halos get caught, but the AI's first guess ships without a refine pass, and regions a luminosity or color mask would have edged cleaner still get hand-brushed.
- Strong (the working level of a serious amateur): tool matched to boundary. Luminosity for a tonal region, color for a hue, graduated for a soft transition, radial for a pool, refine-edge on every object mask; the feather matches the boundary, the 100%-then-thumbnail check runs on every mask, and the seams never show.
- Advanced (a late rung: plenty of otherwise-fluent editors never reach it): describes regions exactly, and knows when not to. Masks stack with intersect and subtract until the selection fits the region so precisely the adjustment needs no timidity to stay hidden, and when the capture gave no edge to select against, the honest move is recognized as the reshoot, not a more elaborate mask built around nothing.
Idi i slikaj
Run this in two parts, because masking has a pure-selection side worth drilling on a throwaway and a real-picture side that goes to the critique, and only the second one meets the machine.
First, the selection drill, to calibrate your eye for edges. This is a practice target: it never goes near the critique. Open any image holding three different KINDS of region: a smooth sky, a hard-edged object (a building, a sign), and a soft-edged one (hair, a plant). Isolate the sky four ways (a graduated mask, a luminosity mask, "Select Sky," and a hand-brushed mask at full hardness) and compare only the edges, filling each selection with a flat, obvious color so the border is brutally visible, then punching to 100% and walking the horizon in every version. You will see which tools feathered the transition for you and which left a hard line to clean. Repeat on the hard object and the soft one. Then deliberately manufacture the two tells with your own hands: a mask too hard for the hair, so it wears a cut-out rim, and a feather too wide for the building, so the fill spills off its edge. A halo and a cut-out you have built once, on purpose, are ones you will recognize on sight for the rest of your editing life.
Now the real-picture loop, on an actual photograph. The strongest candidate is the very image whose critique sent you here: open the RAW whose critique named edit discipline as the limit. That verdict was almost certainly reading a global move that taxed the whole frame: a contrast, saturation, or color push applied everywhere to fix one region. Undo the global version and redo it LOCAL: mask the region that actually needed the move, match the mask type to its boundary (luminosity for a tonal region, color for a hue, graduated for a sky, radial for a pool, Select Subject then refine for a figure), feather to the edge, and let the adjustment land only where it belongs. Stack a second mask if one selection cannot describe the region cleanly. Then upload that version as a new version of the image and let the re-critique read it against the original.
The capture is frozen by construction, and this time even the adjustments are the same ones: the single variable you moved is WHERE each one lands. Edit discipline is the verdict that routed you here, and a global slap redone as a clean local move is exactly what should retire it: if the seams and the tax were the cost, the fresh critique should drop edit discipline as the named limit, and the FinalFrame Score should move up behind it (most visibly on the Technical sub-score, where a clean selection reads first).
And if edit discipline holds its place, that is information, not indictment, and it splits into two readings worth telling apart. The first is a seam you can still find yourself: pull each mask's strength to zero and toggle it back (the one adjustment whose return you can SEE arrive, as a shape rather than as better light, is the selection that stayed too broad or too hard, and that single mask is the next move). The second is subtler: the borders may all be clean and the move itself still too strong (the where fixed, the what still past what the frame wants) in which case the remaining work is the restraint half of edit discipline, not the selection half, and it costs one more pass at lower strength. Either way the diagnosis is one toggle away, which is more than most verdicts offer. The border that shows is always the border to fix, and when no border shows and the verdict stands, the strength is the border.
Povezane lekcije
Vidi to na svojoj fotografiji
Najbrži način da razumeš ocenu jeste da je pročitaš na kadru koji dobro poznaješ.
Kritikuj fotografiju